Clinical Review
Select the appropriate tab to learn about completing Clinical Review in your province.

To complete Clinical Review:
-
From the Workbench, select the Clinical Review queue. Prescriptions that are currently in the Clinical Review queue display in the prescription grid.

-
Select the prescription(s) that require clinical review.
-
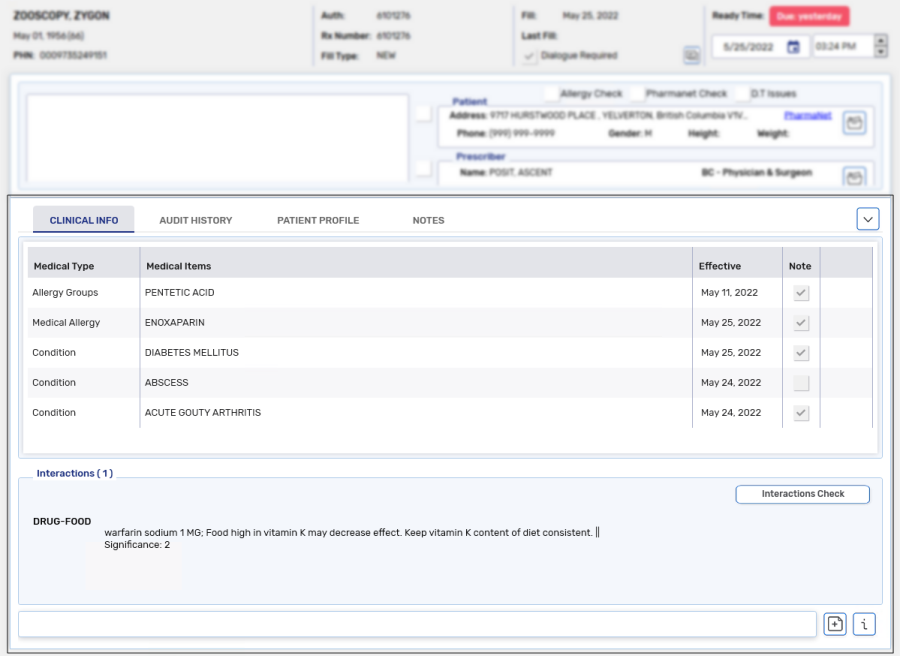
Select Process. The prescription opens in the Clinical Review window.
-
Select the expanding arrow
 to open the clinical information section.
 -
Select the Allergy Check, Pharmanet Check, and D.T Issues checkboxes if the checks are completed at Clinical Review.
If the prescription is parked after selecting the Allergy Check, Pharmanet Check, and D.T Issues checkboxes, they must be selected again when the prescription is processed.
-
Review the clinical information in the following tabs.
-
Clinical Info - displays medical allergies and conditions.
If a warning indicator
 appears on the Clinical Info tab, that means a moderate, severe, or contraindicated interaction exists. You must open the tab and review the information. If this is not done, you will be returned to the Clinical Review window upon selecting Sign Rx, and the Clinical Info tab will be forced open. You must select Sign Rx again to complete Clinical Review.
 -
Audit History - displays the history of the prescription, such as previous fills and authorizations.
-
Patient Profile - displays the prescriptions on the patient's Profile tab. The patient's PharmaNet Profile can be viewed by selecting the PharmaNet link.
-
Notes - displays notes marked as Print in the Prescription, Prescriber, Drug and Patient Notes tabs.

-
-
Review any interaction checks, by highlighting the interaction and selecting Interactions Check. Interactions are sorted in descending order by severity: (1) Contraindicated, (2) Severe, (3) Moderate, and (4) Low. Within each severity category, the interaction types display in the following order: (1) Drug-Allergy, (2) Drug-Drug, (3) Drug-Medical, and (4) Drug-Food.

-
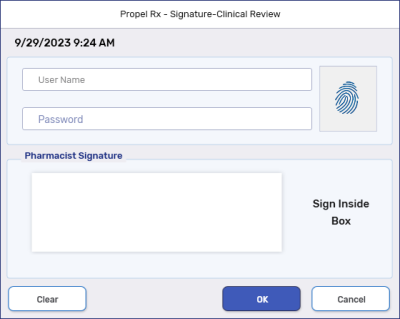
Select Sign Rx. The Signature window appears.
-
Sign the prescription using one of the following methods:
-
Credential entry - initials of the signing Pharmacist are used.
-
Biometric fingerprint scan - initials of the signing Pharmacist are used.
-
Manual signature using a signature pad or mouse - the initials of the logged in Pharmacist user are assumed. However, the signature of the signing pharmacist is captured and appears on all prescription documentation.
The methods available depend on the hardware installed at the workstation and whether an E-Signature has been set up for the logged in user.
Workstation or User Setup Credential Entry Fingerprint Scan Sig Pad Signing Mouse Signing Signature pad & fingerprint reader Yes Yes Yes Yes Signature pad, no fingerprint reader Yes No Yes Yes Fingerprint reader, no signature pad Yes Yes No Yes No signature pad or fingerprint reader Yes No No Yes E-signature for logged in user Yes Yes No No By default, Propel Rx auto-detects which method was used and displays the signing method to the right of the signature box. Auto-detection has been tested with the McKesson supported signature pads: Topaz TS460 and 461.

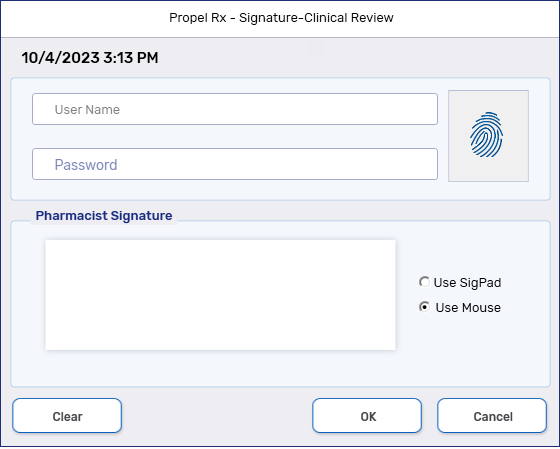
If you are using a signature pad that is not compatible with the auto-detection functionality, the auto-detection backend preference can be turned off and the bottom portion of the Signature window will have two radio buttons for the user to choose whether a signature pad or mouse is being used. Once a manual signature is entered, the radio button selection will be saved for the next prescription, regardless of which instance or workstation it's signed off on. If user credentials or a fingerprint is used to sign for the prescription, the Use Mouse option will be defaulted for the next prescription.

-
Next Steps?

To complete Clinical Review:
-
From the Workbench, select the Clinical Review queue. Prescriptions that are currently in the Clinical Review queue display in the prescription grid.

-
Select the prescription(s) that require clinical review.
-
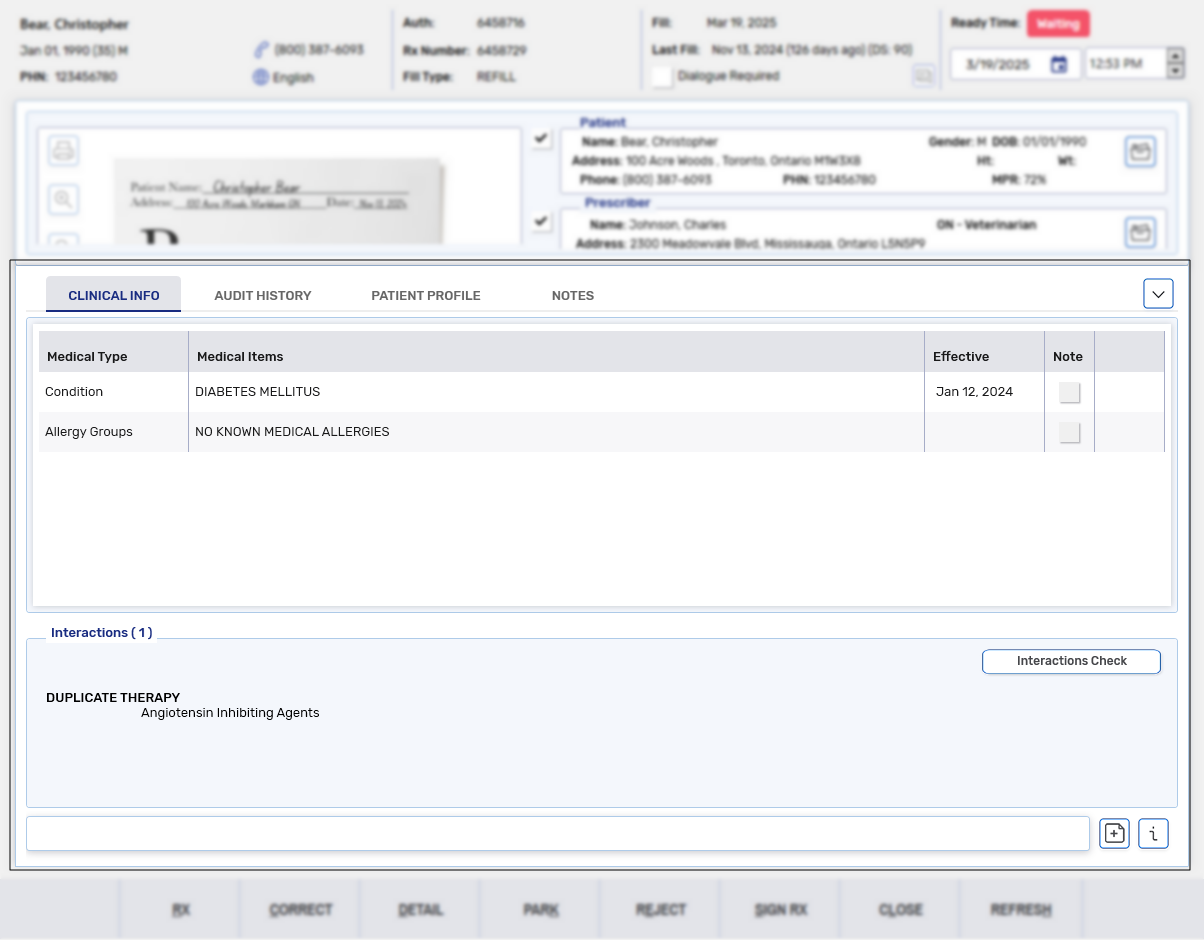
Select Process. The prescription opens in the Clinical Review window.
-
Select the expanding arrow
 to open the clinical information section.
 -
Review the clinical information in the following tabs.
-
Clinical Info - displays medical allergies and conditions.
If a warning indicator
 appears on the Clinical Info tab, that means a moderate, severe, or contraindicated interaction exists. You must open the tab and review the information. If this is not done, you will be returned to the Clinical Review window upon selecting Sign Rx, and the Clinical Info tab will be forced open. You must select Sign Rx again to complete Clinical Review.
 -
Audit History - displays the history of the prescription, such as previous fills and authorizations.
-
Patient Profile - displays the prescriptions on the patient's Profile tab.
-
Notes - displays notes marked as Print in the Prescription, Prescriber, Drug and Patient Notes tabs.

-
-
Review any interaction checks, by highlighting the interaction and selecting Interaction Checks. Interactions are sorted in descending order by severity: (1) Contraindicated, (2) Severe, (3) Moderate, and (4) Low. Within each severity category, the interaction types display in the following order: (1) Drug-Allergy, (2) Drug-Drug, (3) Drug-Medical, and (4) Drug-Food.

-
Select or clear the Dialogue Required checkbox if dialogue with the patient is required or not.

-
Select Sign Rx. The Signature window appears.
-
Sign the prescription using one of the following methods:
-
Credential entry - initials of the signing Pharmacist are used. This option is not available for Manitoba or Alberta pharmacies.
-
Biometric fingerprint scan - initials of the signing Pharmacist are used. This option is not available for Manitoba or Alberta pharmacies.
-
Manual signature using a signature pad or mouse - the initials of the logged in Pharmacist user are assumed. However, the signature of the signing pharmacist is captured and appears on all prescription documentation.
The methods available depend on the hardware installed at the workstation and whether an E-Signature has been set up for the logged in user.
Workstation or User Setup Credential Entry Fingerprint Scan Sig Pad Signing Mouse Signing Signature pad & fingerprint reader Yes Yes Yes Yes Signature pad, no fingerprint reader Yes No Yes Yes Fingerprint reader, no signature pad Yes Yes No Yes No signature pad or fingerprint reader Yes No No Yes E-signature for logged in user Yes Yes No No By default, Propel Rx auto-detects which method was used and displays the signing method to the right of the signature box. Auto-detection has been tested with the McKesson supported signature pads: Topaz TS460 and 461.

If you are using a signature pad that is not compatible with the auto-detection functionality, the auto-detection backend preference can be turned off and the bottom portion of the Signature window will have two radio buttons for the user to choose whether a signature pad or mouse is being used. Once a manual signature is entered, the radio button selection will be saved for the next prescription, regardless of which instance or workstation it's signed off on. If user credentials or a fingerprint is used to sign for the prescription, the Use Mouse option will be defaulted for the next prescription.

-